Friday, January 9, 2015

Transitions

Wow - it's been nearly 2 years since I last posted here.  I have been crafting, though not as often as I was nor as often as I would like. Life has just gotten busier, priorities shifted. There's more to do, less time, and less energy.  So crafting and blogging were low on the priorities list.  

During the past two years, my crafting has gotten leaner.  I haven't done a class project in quite a while.  My daughter's class is made up of two 20 children classes and my son just started kindergarten so instead of just making 20- 24 items, it's now 60-64 items.  So it's quite a bit more daunting.  After burning out on lots of Christmas projects and burning the midnight oil from Thanksgiving to Christmas, I decided to dial back the craft ideas. Trying to keep them simple and easy so I can enjoy that special time of year and not be  a scrooge.  

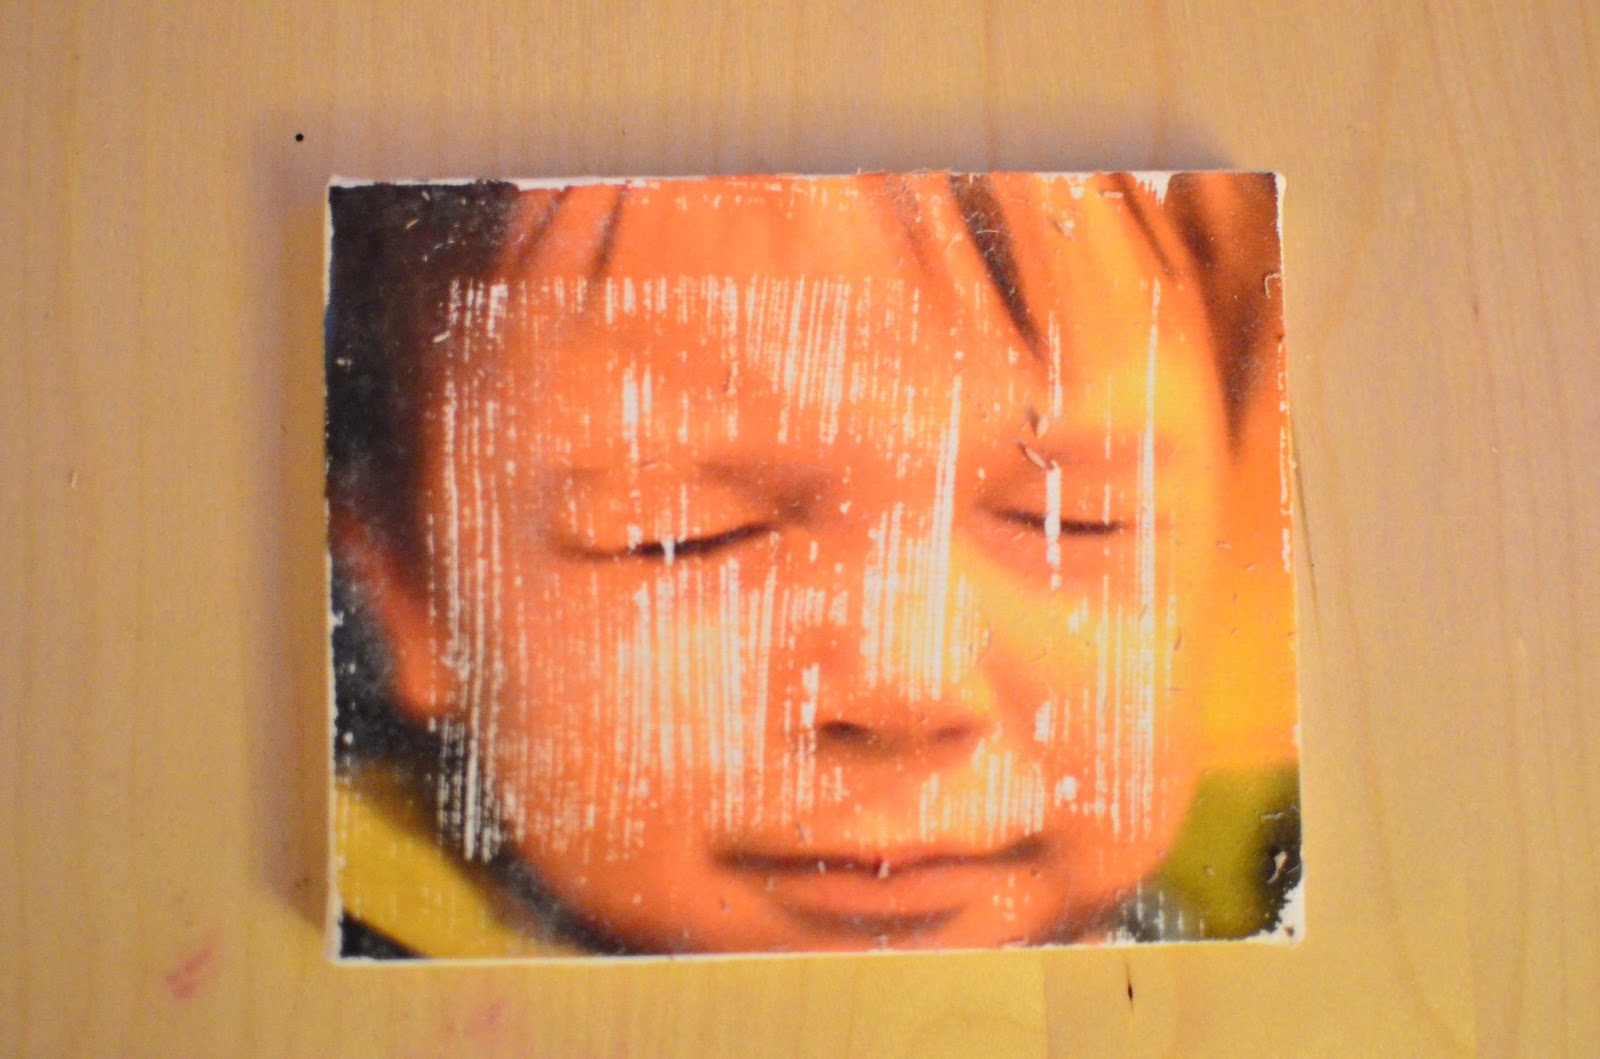
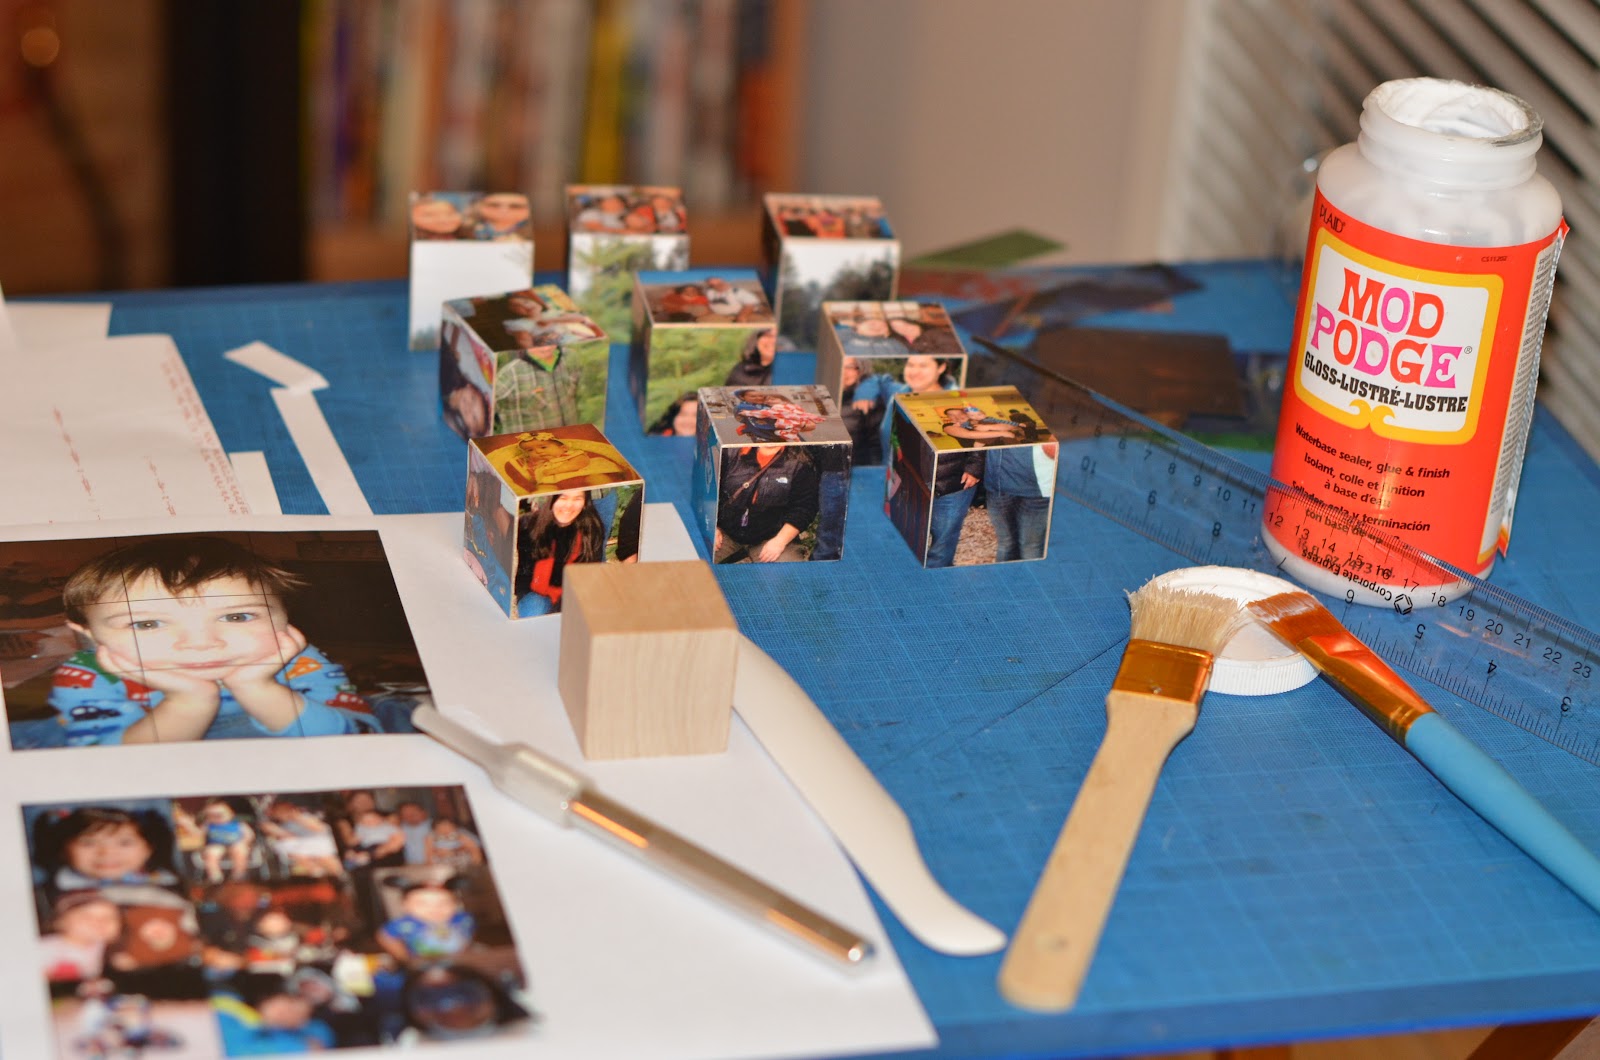
But I have been crafting.  Lot's of knitting, which I like because I can do it while watching TV or while on long car rides.  The last couple of years I've taken Ikea Lack-type tables and done beautiful photo collages and sealed them with epoxy.  This past Christmas I took plane white dollar store mugs and used oil based markers and dishwasher safe Modpodge to write a saying on them and included packets of hot cocoa.  So still crafting, still being creative, just more judicious in the time spent and the projects chosen.  

I've been focusing more on career development. I have found a great space working in palliative care and truly believe in what we do.  It's what all of medicine should be - listening to not only patients' hearts beat, but also what makes them beat. What part of a patient's life gives them joy, gives them the will to live? What do they need to feel productive, needed, to feel alive?  And how can we help them attain those goals.  Healthcare, before and after Affordable Care Act, is driven by insurance reimbursement, which pushes medical providers to provide care in less time, or worse things, in order to make ends meet.  We take the focus off of the disease and refocus on what it will take for our patients to have the best quality of life possible, with whatever time they have left.

Currently, I'm part secretary, part program coordinator, part program development.  And I'm the only one really, other than my boss, to do administrative work for the practice.  I like having a pulse on our patients. Being the one to triage their calls and e-mails, but we are growing so much that I can't focus on the other part I like - the creating, the developing, the innovating.  Not to mention I also feel like I don't have all the skills to fully participate.  So I am looking into graduate programs and other ways to grow professionally and hopefully, grow here in this current location. 

This focus on career, though,has been a large part of the decline in my blogging.  I want to continue writing, but I want to expand my focus to beyond crafting and life at home.  I want to engage in writing about palliative care and healthcare issue as well as my latest craft project and parenting trials and tribulations.  I'm not a particularly articulate or eloquent writer but I hope to improve with experience.  

2015 - with only 9 days to your name, there is so much potential! Insanity by Crafting no longer serves that potential.  This blog needs a new name to go with the new, broader focus.  When we meet again, it will be under a new name.

Happy New Year!!  


Saturday, February 16, 2013

The Insanity Never Ends

So much for blogging last year.  There just was too much going on professionally, educationally and personally to write.  I don't know how others do it - I can't seem to find time to craft consistently, much less take beautiful pictures and blog about each project.  The biggest issue is probably organization and time management and my eyes just are too big for my hands - I want to do it all and keep adding last minute "easy" projects at the 11th hour.  And overall, raising two kids, working fulltime, keeping house (rather poorly), crafting and also finding me time is challenging.

This past fall was a flurry of numerous projects.  I made photo cubes (5 sets), paper covered pencils, paper covered composition books, candle holders, washi taped decorated mini binder clips, crocheted feely hearts, photo canvases, and tile necklaces.  Also put together a 500 piece Thomas Kincade puzzle that's shaped like a wreath, ie no straight edges and mod podged and framed it.  The kids also painted on 4x5 canvases and made salt dough ornaments.


This was probably the first year that I pretty much finished all my intended projects and then some, so it was quite a success.  However, by time Christmas came I was exhausted and stressed and sleeping only about 4 hours a night.  So like every January, I was spent and just wanted to veg out.  Unfortunately, my little bear got sick right as my winter vacation started and got better right after New Years, in time for us to enjoy a trip to Disneyland.  Then when we got back, the day before school was to start, both my Nana Bear and I caught the same bug and were out of commission for a whole week.  So not really any rest for the weary.

To top it all off, I had organized a baby shower for 3 of my co-workers that was the Sunday after I got sick.  Luckily I started feeling well by Saturday and was able to modify my ideas and shop for what was needed.  I pushed myself a little too hard that day, but the baby shower was great fun and successful.  The trend on pinterest seemed to be DIY onesies and everyone loved doing them.  The favors were not creative - different valentines candy, but at least there were favors.

My resolution for the new year is to start my Christmas gift projects sooner.  My goal is to start in February or March and do one or two projects a month.  I've been pursuing Pinterest and the net for great ideas and started a google doc spreadsheet to keep them all logged.  My theme this year seems to be bath and body products, which I haven't done before, and kid driven projects.  Now that they are getting older each year they are able to help more and more.  So far my list is as follows (and not necessarily just for Christmas):

1. Homemade shave cream: At Food for my Family, via pinterest, I saw this recipe for Rosemary Mint shave cream.  My dear husband is a shave cream fanatic - very picky about what he uses, so hopefully he'll like it.  I don't often make gifts for the guys so it will be nice to do so this year.  Father's day or Christmas.

2. Homemade Lip Balm: I was thinking of making these for Nana Bear's class for the end of the year.  And can always have some on hand stocking stuffers.

3. Hand Salve: I know a few gardeners and thought hand salve would be nice gift for mother's day.

4. Kid made stationary: Saw lots of fun ideas on pinterest for decorating paper - melted crayon artmarbleized papercolored bubble art, Salt, paint and glue art, etc. - that I can see the kids having fun doing.  I may frame some of it, but I want to make stationary with it and give to the family and teachers.

5. Acrylic Paint Splattered notebooks: A number of my co-workers use notebooks and last year I intended to cover more composition books with paper and glitter tape for them, but didn't get a chance. This continues that them and I think I'll do a mix of paint splattered notebooks and paper covered.

6. Crocheted hair band: Yarn art is still a joy - I can watch tv and crochet or knit at the same time, so I can get some time with my husband watching our favorite shows and still get some crafting done.  This will be great for the cousins and girls at school.

7.  Homemade Firestarters for Camping: This wasn't the original site that I found this recipe, but sadly I can't seem to find the blog... The other recipe used old, broken crayons, which I plan to use, at last in part.  We're a camping family so I figured these would be great, natural firestarters for camping trips.

8. Family Photo Wreath: I love to have personalized, family gifts and this is a great idea, taking dollar store photo frames and hanging them in a wreath.

9. Plasti-Dip Origami: I found this project at Instructables.  I love origami and this seems like a cool project.  I see many possibilities from ornaments to jewelry.

10. Skittle Flavored Vodka: Because I'm still a party girl at heart...

11. Plantable Valentines:  After much contemplation, I decided that we would make plantable Valentines.  Ecological, non-candy/sugary, yet sweet.  I'm not going to cut them out into animal shapes, sticking with the traditional hearts instead.  I like that she doesn't use a screen, so we'll see how this turns out.

12. Felt Fortune Cookies: Possibly a Chinese new year craft.  I think it would be cute to put lycee in this year.  Of course, CNY is close to Valentine's day this year... So we'll see.  I have lots of felt, so definitely a possibility.

13.  Upcycled glass vases:  Saw this on Pinterest and these look so clean and simple.  Could use washi tape and scrapbook paper or velum.  Could also use photos on velum instead.

And many, many more ideas...  We'll see how much gets done, but I'm hoping that by posting the list, I'll stay the course.


Wednesday, September 12, 2012

Back to School Night

Tonight was Back to School Night at Nana Bear's elementary school.  So far this year, I have not been as present as school as I have in past years.  Nana has decided that she doesn't want me waiting with her in the mornings and now that Dare Bear is going to pre-school that is nearby the elementary school it is just as easy to just drop her off and then drop him off.  But I miss chitchatting with parents or teachers before school and feel a little disconnected.

So, tonight was one of the first opportunities to get a feel for the teacher.  So far, he's been great - e-mailing at the end of the first week, over the weekend no less, sending out reminders for picture day, etc.  BUT, of the two 2nd grade teachers, he is also the less structured teacher and when it comes to school stuff, I'm all about structure, comforted by structure.  Nana, however, has been very happy and extremely excited to be in this class.

He answered a lot of good questions from the parents and in a thoughtful manner.  I like his philosophy and more importantly, I think his style suits Nana well and also balances out my tendency to be strict.  He raised many good points and this year will be learning experience of both Nana and I, but in a good way.

Monday, September 10, 2012

Photo Blocks


I can't remember what inspired this idea, whether it was another craft blog or photo site or if I came up with it on my own, but I've had it in my head to do for at least 3 Christmases now and I'm finally following through. As I posted yesterday, Pick Your Plum ran a deal on sets of 9 - 1.5 inch wooden cubes, which after shipping came to about $6.75 a set. I had half a 16 oz bottle of Mod Podge left over from last year or the year before, finally bought a bone folder, and 21,000+ photos to choose from, so this year seemed as good as any to make some photo blocks.

Tools needed:
Wooden cubes - I was lucky enough to find these at Pick Your Plum.  If you have older kids, who no longer play with their blocks, you can upcycle old baby blocks.

Mod Podge - or other glue that drie clear.

Exacto Knife

Bone Folder - for  smoothing out the photos on the blocks and making sure the edges stayed down.

Ruler

Paint Brushes - I usually like to use foam brushes to apply glue, but I couldn't find my supply so I used a combination for fine bristle and coarse bristle brushes.  I found that I liked the texture of the coarse bristles for the top coat, but I the fine bristles were nicer to adhere the photos to the blocks.

Photos - Since these will be Christmas gifts for family, these are themed sets personalized to the recipient.  The pyramid of cubes is the set for my sister-in-law.  The wedding was a couple of years ago so I can still use pictures from the wedding for personalized gifts.

Steps:
1. Choosing Your Pictures:
This is the most time consuming part of the project for me.  The minimum number of photos you will need is 6 (one large photo per side) and the maximum needed for a set of 9 cubes is 54 for all single photos.  I like puzzles so  I decided to do three large pictures (4.5 inches squared) that use each of the 9 cubes to make up the picture.  On the other three sides, I would do random small pictures (1.5 inches squared).  So I needed 30 photos total.
The top photo is one of the large photos.  As you can see the one photo is cut into 9 pieces, one for each cube. The bottom photos are 9 single photos.
2. Editing and Templating:
It's helpful if you create a template.  Since my photo block were 3 cubes by 3 cubes, which are 1.5 inches cubed, my template was a 4.5 inch square grid, made up of  9 - 1.5 inch squares.  I made the lines as skinny as possible and a dark grey and kept it in the forefront.  This will help when you cut the pictures - you can still see the lines, but they don't stand out so much when you glue the pictures to the blocks. When I edited the pictures for the large pictures, I tried to avoid having eyes fall on the lines, ie become bisected by two blocks.

3. Printing and cutting:
I printed on both glossy (brochure paper) and regular copy paper.  I didn't want to use photo paper because I didn't want to use thick paper.  I used the ruler to line up agains the grey lines of the template and used an exacto knife to cute the pictures out into 1.5 inch squares.

4. Glueing the Pictures to the block:
At first I used only the coarse bristed paint brush (about 2 inches wide), but its a cheap brush and small pieces of the bristles would sometimes stick to the cube and I'd have to take it off so it would create bumps on my pictures.  So I started using the fine bristled brush to coat the one side of the block with Mod Podge. I'd then place my 1.5 inch square photo on the cub, use the bone folder to smooth out the picture and apply pressure to the edges to make sure there were no dog ears.  Also, if you picture is just a little to big on any side, you can use the bone folder to fold the extra paper over to the next side.

5. Top Coat:
I used the coarse bristle brush to pain on a top coat of Mod Podge.  When I switched to the fine bristle brush for the base coat, I found that the fine bristles did not leave as musch texture on the top coat, so I switched back to the coarse bristle brush for the top coat.  I like I can feel the brush strokes on pictures, but if you want a smoother look, go with the fine bristles for the top coat.

6. Let Dry  and Viola! Photo cube.  Repeat 6 times per cube and you're done.


I would do two - three sides of a set each night because I liked to let the sides dry a little before going on to the next side.  You could do 5 of 6 sides one night and then the last side the next night or a few hours later.  Also, I am thinking of lightly sanding the sides and apply a second coat of Mod Podge, but for now these are good enough.  If I have time and think they need them, I'll apply a second coat closer to the holidays.

Later this week, maybe even tomorrow, I'll have worked out all the kinks to my candle holders and can post my tute for those.

Until then, Happy Crafting!

Check out these link parties for more inspiration:

Clare's Room's Under the Christmas Tree

Kootoyoo's My Creative Space

And 

A Marvelous Mess

Sunday, September 9, 2012

It's That Time of Year Again

After several months of minimal crafting activity, the workshop is buzzing with activity again as the holidays approach.  This year will feature less yarn work, which, while enjoyable, could be time consuming to finish one item.  This year is a mod podge and kids theme with some projects for me and some projects for us.

The project list:

1. Photo Cubes


Pick Your Plum had a deal on sets of 9 - 1.5 inch wood cubes.  I've been wanting to make photo cubes for a few years now, but every year that project doesn't make it to fruition, so I couldn't pass up these sets.  I've completed two sets and third set is under way.  There are 6 sides to each cube and for these three sets I decided that for three of the sides, the 9 blocks would create one picture and the for them remaining three sides, I would put single pictures (as pictured in the top photo).

2. Candle Holders

I saw this picture on Instructables. Iamkeebler had printed photos on transparent labels and wrapped it around a square votive.  So this inspired me to print color photos on transparency paper and mod podge it to cylindrical votives.  

The glasses that I got aren't cylindrical and the mod podge didn't dry as clear as I would have liked, so I have some tweaks to make, but overall I am happy with finished product and am learning a lot in the process.

3. Washi tape binder clips
For work gifts, I wanted to find a project that was simple and cheap.  I haven't played around with washi tape yet and I thought it would be nice to decorate the boring black binder clips with washi or decorative tape and if I run out of the tape, I can use paper.  I've done a couple of test runs and plan on sealing them with Mod Podge.

4. Paper covered pencils, pens, and erasers
For Nana Bear's classmates, I thought of covering pencils with decorative paper, possibly washi paper. On the drawing board, it's a simple project, but of course, when done in bulk, who's to say how simple it will be.

5. Mini Canvases
Discount School Supply sells Mini Canvases with Easels, 6 for ~$15.00 Nana Bear loves to paint, so I thought this would be a great project for her. Dare Bear hates to be left out, so I'm sure he'll do his share of painting as well.  These will be great for the grandparents and the great-grandparents.

6. Melted Beads
I saw this on One Pretty Thing a couple of weeks ago. The Artful Parent was melting pony beads and making mobiles and sun catchers with them.  The kids loved helping me make the sand art candles, so I thought this would be a great project to do with them.  Instead of mobiles or sun catchers, these will be ornaments and I can use the cookie cutters I bought to make the x-mas candles from the last year or two (each year's projects seem to be blurring together). I do have some concerns about the fumes from the melting plastic, so these is a maybe project.  A strong maybe.  I like the possibility of doing it outside on the grill, but we'll see.

My Pinterest Project board has many other projects I'd like to try, but this crafter has only so many crafting hours before Christmas, so we'll see if these list grows and contracts.  I really hope to finish all the projects on this year's list as most years I get overly excited and over estimate my ability (and under estimate the time needed to finish each project).  I am hoping by starting a little earlier I will get through each project.  Crossing my fingers I stay sane this year.

Happy crafting!

Linked to:

Clare's Room's Under the Christmas Tree

And 

A Marvelous Mess

Friday, January 6, 2012

Ahhh...

Ahhh.... Finished a work project that I have been diligently working on in the evenings at home and it feels good to have completed it.  Still lots of other work to do, but nothing that has to be taken home, which means I can focus on cleaning up my craft supplies after the Christmas rush, complete a few outstanding projects, and then start perusing pages for new projects and start new projects!

Monday, January 2, 2012

New Year Resolutions for 2012

On my iGoogle site, I have a page devoted to craft blogs that I follow.  I can't spend as much time admiring and perusing all the wonderful projects that I come across anymore, but I still find time to take a peek now and then.  As this new year begins, I ponder the amount of time, energy, wherewithal, organizational skills, and craft skills, it takes to keep up such wonderful, successful blogs.  I don't know how these amazing women and men keep house, work, raise kids and turn out wonderful projects AND find time to write amazing blog posts with equally amazing pictures, and some even sell their crafts.

Since August, my crafting was entirely devoted to Christmas gifts (and I still have a project or two left over).  I decided this year would be needlework gifts - crocheting and knitting.  In all I completed 4 crocheted scarves, 1 crochets shawl, 1 crocheted caplet, 2 knitted healing shawls, and 3 knitted scarves.  I am working on knitted hooded scarf.  I have 2-3 sets of crocheted, beaded necklaces and earring sets that just need to be completed with jewelry findings.  I also finished 87 2x2 tile magnets with pictures of my family, 9 trivets - also mounted with photos, though one did not turn out, and 3 hanging photo tiles.  And Nana Bear and Dare Bear and I made 48 candles with beaded candle wax (much like sand art).


It's amazing how much time it took to make all of these projects.  I finally realized that "easy" does not automatically mean quick.  Two of the crocheted scarves took about 10 days each to finish.  The knitted shawls took 5 days each.  Of course, I wasn't knitting 8+ hours a day or anything, but fitting in a couple of hours here and there each day.  So as it goes every September - December, things started out at what seemed like a good pace only to end in a mad dash to finish and staying up to insane hours of the night.   The week before Christmas I didn't go to sleep before 1AM and couple of nights were 2 AM or later.  Santa is a slave driver.

So it wasn't as if the year was a failure, but I did miss many of my crafting goals: start selling on Etsy and keeping up this blog being the biggest two.  I haven't given up on either goal, but as usual, have extended my deadline or modified my expectations, or will modify my expectations.  I would love to blog weekly or more frequently, but I didn't even post monthly on my family blog either, so as reasonable as weekly sounds, it probably isn't realistic for me.  So a bi-monthly expectation might be better.

Also, I think I will plan my posts out a little more, rather than just sit down and write.  I love the weekly round-ups that I see on the web, but I felt rushed to add something each week and stressed about missing them.  I began doing more and more at work and when I got me new job, that no longer worked.  I should be working along my own time line, not to have an entry on a round-up.  My next post will include photos of my Xmas projects, links to the patterns I used, pros and cons, etc.  If I pick out the photos, crop and edit them, and write a little each night, then I'll feel happier with the blog overall.

I will start selling my projects.  I need to work on the products and not worry about branding.  I need work on projects in an organized manner as well.  I tend to work on whatever catches my fancy, which means I have about a dozen unfinished and some are even not yet begun projects because another one catches my eye.

And most importantly, I just need to breathe.  Everything else will come as long as I breathe.  If I stress about it, I'm just wasting energy and not having fun any more.

So the 2012 Resolutions:
1) Have more patience with the kids.

2) Blog 2x month on both blogs

3) Start selling on Etsy

4) Go to sleep earlier (will help with goal #1)

5) Keep the house neater

6) Exercise more

7) Keep on crafting and keep being creative

Happy New Year to all!